2. Benefits of Electrolytic Polishing
3. Disadvantages of Electrolytic Polishing
4. Is Electrolytic Polishing Graded?
Electropolishing (or Electrolytic Polishing, EP) is a polishing method in which metal ions are eluted from a metal surface to smooth the surface.
This adds functions such as “removing dirt such as oil and buff powder” and “inhibiting microbial adhesion” to metal surfaces.
In stainless steel, it also increases the chromium concentration on the metal surface and improves corrosion resistance.
For pharmaceutical manufacturers seeking to avoid contamination and corrosion resistance from surfaces, electropolishing is essential from the standpoint of GMP and validation.
▲The electropolished stainless surface has a slightly blackish sheen (tank in the center of the photo).
Electropolishing causes the metal surface to melt slightly.
It doesn't melt so much that you can tell it's fluffy when you touch it, but it's about one-third the thickness of the copy paper. (20 ~ 30 microns)
It adds function by melting the surface thinly, so if you think of it as “reverse plating,” it may be easier to imagine.
Electrolytic polishing offers the following benefits:
1)To remove dirt that can't be removed by regular cleaning
2)To make stains harder to leave and easier to remove
3)To improve corrosion resistance for preventing rust.
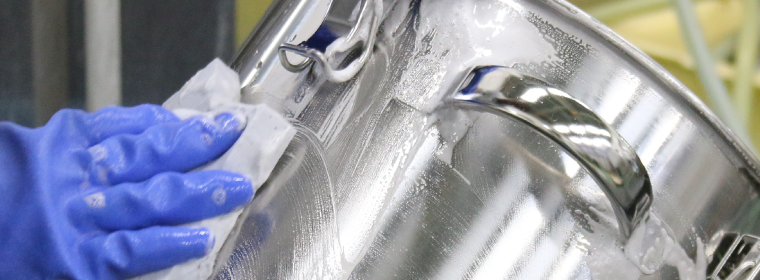
It can remove oil stains from processes such as rolling and pressing stainless steel or buffing after welding (Also called “degrease”) .
These stains enter the complexly deformed stainless steel surface and are difficult to remove with regular cleaning.
Electropolishing dissolves the convex part of the surface and produces a smooth surface, allowing dirt to be exposed and easily removed.
Raw Material Surface
Buff-Polished Surface
Electrolytic Polished Surface
Rough surface
Mingled with buff powder and greasy dirt
Clean, smooth surface
It's not just when it's new that you can keep it clean.
You can see from the image above that the electropolished surface is very smooth and the surface area is reduced.
Compared to the condition in which the uneven surface collapses after buffing and there are many fine gaps, it can be kept clean with less dirt remaining and easier to remove even after repeated use and cleaning.
Research by the U.S. Department of Agriculture has also shown that electropolished surfaces are less likely to retain biofilms (collections of microorganisms).
In this way, electropolishing can easily maintain a sanitary metal surface.
To overlap with the beginning of the article, electropolishing increases the chromium concentration on metal surfaces. This is called chromium rich, when the metal surface is covered with a strong passive coating, which improves corrosion resistance.
The passive film prevents the iron in stainless steel from trying to combine with oxygen (= rusting). It's inherent in the stainless steel itself, but the chromium richness makes it stronger.
Electrolytic polishing itself does not have a negative impact on the metal surface, but there are secondary drawbacks (risks).
It is expensive. In our case, it costs about 2-3 times as much as a container finished with buffing. There is a risk of electrolyte entering gaps. From the design stage, it is necessary to consider applying electrolytic polishing and create a structure with fewer gaps.
Electrolytic polishing is a great technique that has no direct drawbacks, but it may not produce the desired effect if the appropriate method is not used.
Even if it is a stainless steel container that has undergone electrolytic polishing,
it cannot be used without repeated washing…
Dirt adheres to the white tablets and turns them black…
Red rust (rouge) occurs…
These phenomena occur because the electrolytic polishing is insufficient. The difference is caused by the way the electrolytic polishing is applied.
From here, we would like to introduce our company's commitment to electrolytic polishing as a stainless steel container manufacturer.
Place the electrode plates on both sides of the electrolyzer containing the electrolyte (a mixture of phosphoric acid and sulfuric acid) and insert the product between them. When the positive (+) end of the DC electricity is connected to the product and the negative (-) end is connected to the electrode plate, current flows through the electrolyte and the product is subjected to electropolishing.
This method is suitable for electropolishing fine parts, but not for stainless steel containers such as those handled by our company. Although electropolishing should be applied firmly to the inner surface where the contents directly touch, this method results in weak current flow through the inner surface, leading to weak electropolishing.
Nitto Kinzoku Kogyo uses a method that ensures thorough electropolishing of the container's interior.
The main difference from conventional methods is in the electrode plate. Electrolytic polishing is carried out using a custom electrode plate that is tailored to the container's inner surface. This enables a stronger and more uniform treatment, maximizing the benefits of electropolishing.
Our ability to design, manufacture, and consistently electropolish each container allows us to prepare a dedicated electrode plate for every unit. This is the key to Nitto Kinzoku's superior electropolishing quality.
As you may have experienced if you have already used our stainless steel containers, the lid of the container may occasionally fail to open.
The most common cause is the difference in air pressure between the inside and outside of the container. When the temperature inside the container is cooler than when the lid is closed, the inside of the container becomes depressurized, and the lid will not open in any way.
This phenomenon has been introduced in a previous column, but this article focuses on the actual situation in which the lid fails to open due to the difference in atmospheric pressure and how to deal with the problem.
1. why does the lid stop opening in the first place?
2. how the lid looks when the contents have cooled down
3. how to open a stuck lid
4. summary
When a container is filled with a liquid or other substance and then the contents cool down, the lid will not open. Again, this is caused by the difference in air pressure between the inside and outside of the container.
This is the same phenomenon that occurs in everyday life when the lid of a bowl becomes stuck.
As the inside of the container cools with the lid closed, the water vapor inside the container gradually cools and returns to water.
In addition to this, the air inside the container will lose its balance with the atmospheric pressure outside the container due to the property of air that its volume decreases as it cools.
Thus, the lid cannot be opened when it is pushed by a relatively strong force from outside the container.
We actually tried to reproduce the phenomenon of being unable to open the lid.
First, fill our lever-band and catch-clip type containers about 1/7th of the water and bring it to a boil. Then, the lids are immediately closed and cold water is applied from the outside of the containers for about 10 minutes to cool them.
When the inside of the container is thus cooled, the lid is pushed with strong force from outside the container as explained earlier. If you actually look at the lid, you will notice that the center of the container is indented more than normal.
We placed a straight scale on the center of the lid to check the dent.
With this amount of pressure, the lid will not open even if you pull it forcefully. In the first place, it is not desirable to open the lid by force, since the contents may spill out.
So, how do you open the lid?
The following is an explanation for each lid shape.
With the lever-band type, the lid can be opened by inserting a microspatula between the packing and the body, allowing air to enter the container.
Just as when opening the lid of a bowl, the lid will open if air is allowed to enter the container and the air pressure inside is equal to the air pressure outside. The details are described below, but unlike CTH, it is relatively easy to open the lid as long as you have a spatula.
Incidentally, the temperature of the contents (water) when the container was opened was 33.6°C.
In the case of the catch-clip type, its shape makes it difficult to open with a spatula. If you try to force it in, you may damage the packing or lid, or even the spatula itself.
If you want to open the lid of the CTH, heat the container to restore the air pressure inside the container. You can also wrap it in a warm towel or boil it in hot water, but this time we will heat it over an open flame.
In this experiment, the lid was closed immediately after boiling, so we waited for a while until the temperature reached that level. The lid did not move at the beginning of heating, but when we heard a rumbling sound from inside, the lid opened easily. Since the boiling point decreases in a depressurized state, the lid opened at 86.6℃.
If you are having trouble opening an existing container, try one of the following methods
If you are planning to purchase a container from now on, you can easily open the lid by installing a valve or air vent hole on the lid. We can also provide the microspatulas mentioned earlier.
If there is a possibility of putting warm contents into the container, please consider these measures.
A pressure vessel is a container intended to apply pressure to the inside of a vessel.
In Japan, pressure vessels are classified into several types according to their specifications and contents. Therefore, this column explains the standards for pressure vessels in Japan, focusing on First Class Pressure Vessels and Second Class Pressure Vessels.
Contents of this article
Pressure vessels can be dangerous under pressure, so standards are established according to the magnitude and conditions of the pressure.
If they are not strong enough, serious accidents can occur. In Japan, the Industrial Safety and Health Act and Ordinance on Safety of Boilers and Pressure Vessels specify the structure of pressure vessels in detail.
Vessels are classified according to their size and the amount of pressure they handle, and some vessels require certification.
Classifications include First Class Pressure Vessel, Small-sized Pressure Vessel, Second Class Pressure Vessel, and (simplified) vessels.